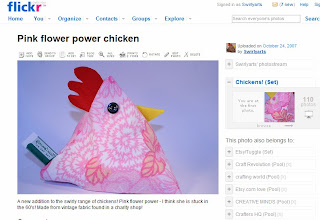
 Then just above the photo is a row of grey commands - one of them says send to group. Click on it and something like this will come up.
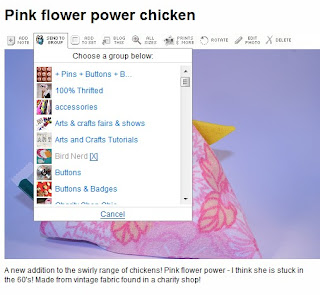
Just click on the group that you want to send the photo to - then something like this will come up to confirm that you have sent it to that group. Just click OK.
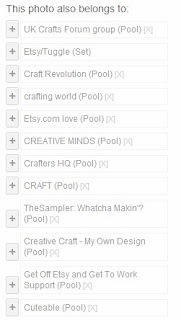
 You can easily see which groups your photo is in by looking to the right of the photo and a list will come up - see below!
Now this method works really well if you only have a few photo's to upload to a group - I'll now show you how to use the organize section for uploading photo's to groups.
 You'll need to look at the top of your photo's page and in the main section there is an organize button. Click on it and it will take you to the page below.
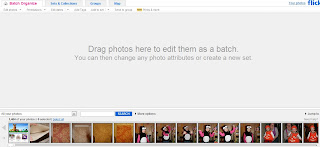 Your photo's come up along the bottom and all you need to do is drag them into the grey section in the middle. Once you have put your photo's into the middle then there is another send to group button - at the right on the pic below.
 Do that and the instructions are just the same as the individual photo upload. If you drag a photo in that you don't want then simply drag it back out again. You can also change the permissions on your photographs from the organize section - it makes it much easier to do a batch at once.
I'm writing this tutorial as some people aren't sure how to upload photo's to groups and rather than tell each person individually then I can just direct them here!! Don't forget to visit my groups on Flickr too UK Craftsforum, Children's art and craft, Cuteable and Etsy Treasury Screenshots.
Hope this helps - shout if not - and feel free to link to this and tell other people!
1 comment:
You're so good to us!!
Post a Comment